Guides

How does it all work?

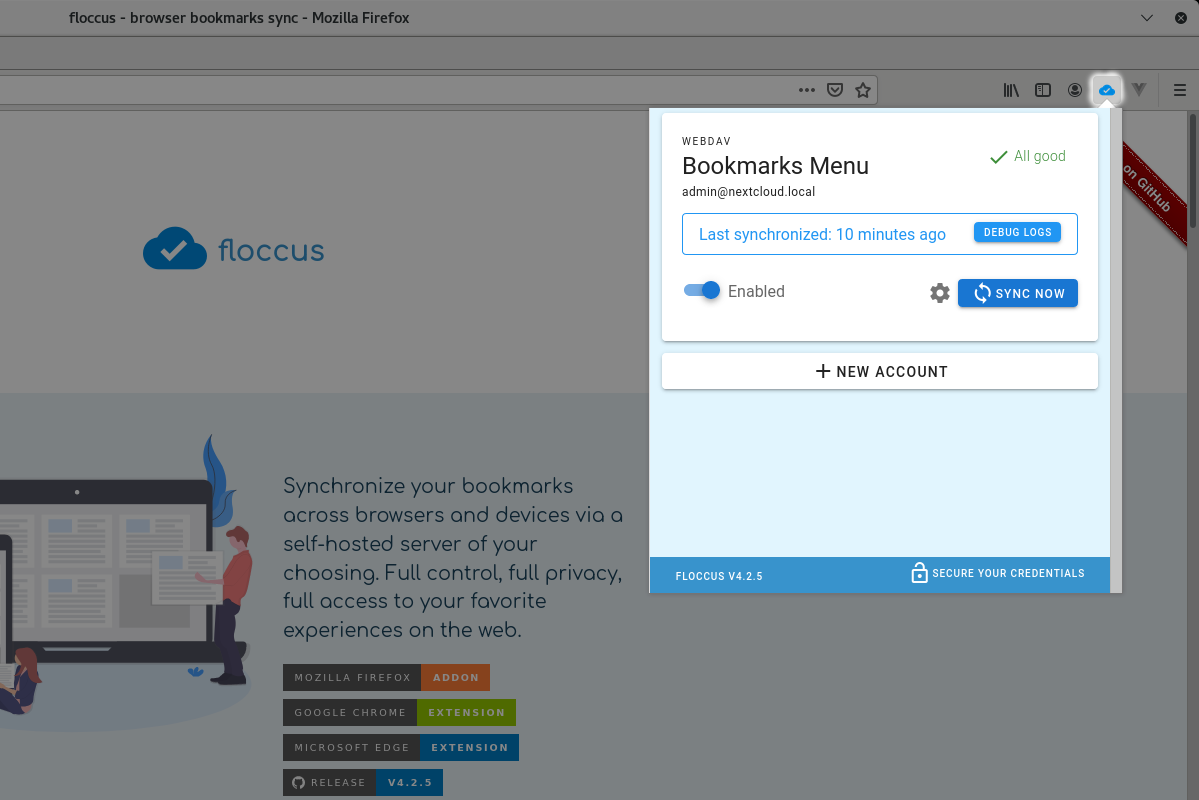
With floccus you can synchronize your bookmarks across all your devices and browsers. Floccus is not so much a bookmarks
manager -- it doesn't give you a managing interface, you can use the browser to sort and cleanup your bookmarks, like you always have.
Floccus is just a syncing tool: It synchronizes your browser's native bookmarks and gets out of the way.

For this to work you need a syncing server, a middle man, if you will, that all your devices can access. Floccus currently offers some
choice here. The simplest choice is to go and use Google Drive for this. If you don't want Google to know your bookmarks, just encrypt them.

If you don't have Google Drive or don't want to use it, using WebDAV may be an option. There are many cloud storage services out there that support WebDAV.
Checkout this list the Cryptomator Community created to see if your provider offers WebDAV.

The most enjoyable way to sync is via Nextcloud Bookmarks. Nextcloud is an open source cloud collaboration tool that you can self-host or rent as a service.
Nextcloud offers a multitude of apps to collaborate and share work over, chief amongst them, the Bookmarks app. If you have a Nextcloud installation available,
try installing the Bookmarks app and set up floccus to sync with it. You can then also access and manage your bookmarks on the go, say from an internet café in Malawi, by simply logging into your Nextcloud with any web browser.

Install in your browser

Floccus is known to work in Chrome, Firefox, Edge, Opera, Vivaldi, Brave and Kiwi. Click on one of the following links to install floccus in your browser.

Your browser will ask you to confirm installation, including the permissions necessary for running floccus. Floccus currently requires the following permissions:

Permission Explanation
storage, unlimitedStorage Necessary for maintaining a cache and mappings between server and browser bookmarks
alarms Necessary for triggering synchronization in regular intervals
bookmarks Necessary for creating and reading bookmarks
Unlimited web access Also sometimes called "read and change data on all websites". Necessary for accessing your self-hosted server. This cannot be limited, because everybody's server has a different URL. Unfortunately, the way webextensions work currently, floccus also gets access to all the data the browser has collected on those websites. However, floccus makes no use of that data and doesn't in any way collect information about you.
identity Necessary for connecting with Google Drive
history (optional) Necessary for sending statistics about which links you click to Nextcloud Bookmarks (this feature is opt-in)
Install on Android

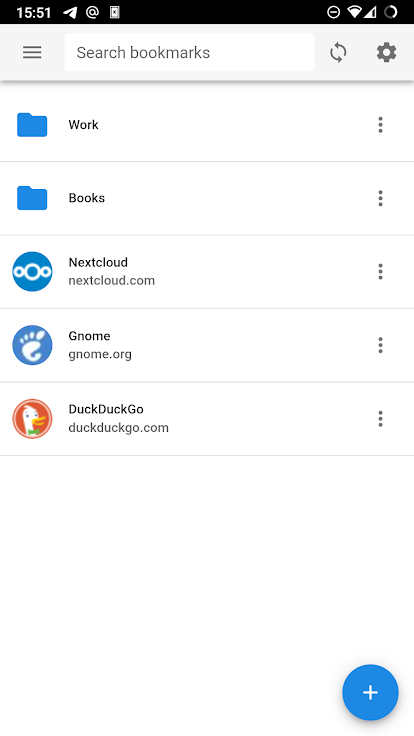
Floccus for Android is in an Open Beta phase and is available from

Like Floccus in the browser, Floccus for Android allows you to create and manage multiple profiles
For techincal reasons, the App does not sync your bookmarks with your mobile browsers,
but makes them available directly in the app itself instead.
You can share links from your browser or other apps to the Floccus App for bookmarking, create and browse folders and search like you would in your browser and open links in your favorite browser.

Sync with Nextcloud Bookmarks
  1. Create a new profile in the Floccus panel
  2. Select Nextcloud Bookmarks as your sync method
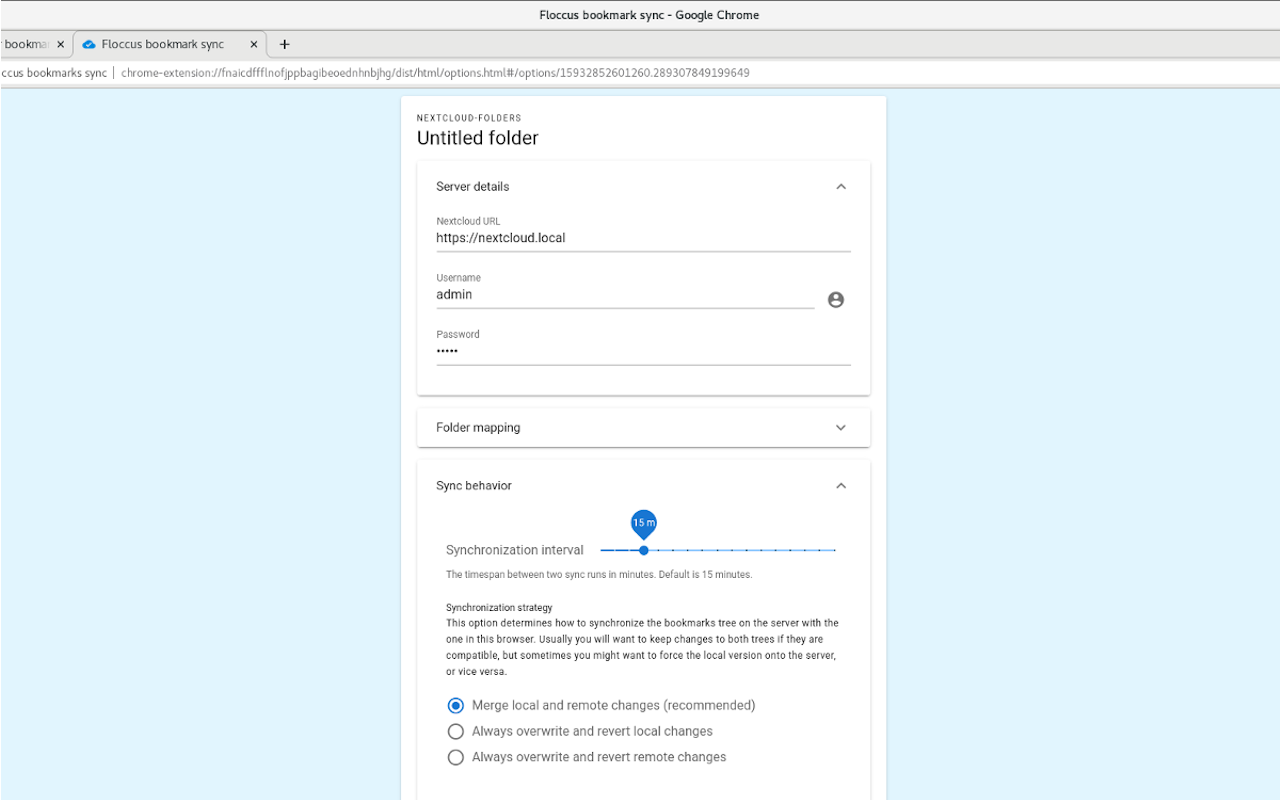
  3. The following screen shows the profile settings.
  4. First you will need to enter your nextcloud URL. This should be the url that you use to access your nextcloud, e.g. https://mycloud.provider.com
  5. Then enter your username and password. If you want to create a separate app password for floccus, click the button next to the user name field, which will direct you to your Nextcloud instance to approve the generation of an app password.
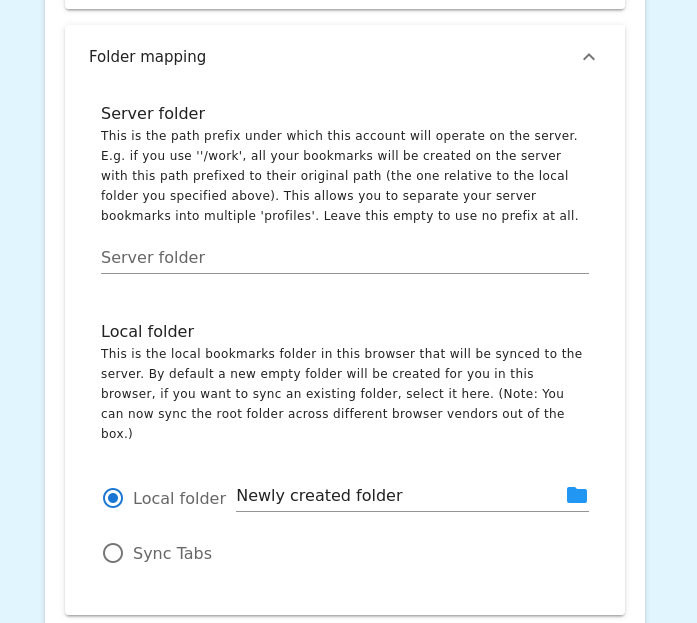
  6. Now, you can configure the folder mapping. You can set one local bookmarks folder and one server folder per profile.
  7. Make sure to disable your native browser bookmark sync service, because it is likely incompatible with floccus. (This can cause frequent duplication of bookmarks.)
Sync with Linkwarden
  1. Create a new profile in the Floccus panel
  2. Select Linkwarden as your sync method
  3. Optionally set a name for your new profile.
  4. The following screen shows the connection settings.
  5. First you will need to enter your Linkwarden URL. This should be the root URL of your Linkwarden server, e.g. https://cloud.linkwarden.app/ for the publicly hosted instance by the linkwarden devs. The URL should end with a slash.
  6. Then enter your username and an access token. Entering your account password will not work, instead you have to generate a specific access token in the linkwarden settings for floccus.
  7. Enter the name of a collection to sync to. All your bookmarks as well as any folders you have will be created under this collection.
  8. Finally, you can choose which bookmarks folder to sync to that collection. By default floccus will create a new folder for you, to avoid syncing something that you don’t want synced. However, with a click on the folder icon you can select any other folder in your bookmarks. Selecting the topmost “untitled” folder will sync everything.
  9. Make sure to disable your native browser bookmark sync service, because it is likely incompatible with floccus. (This can cause frequent duplication of bookmarks.)
Sync via WebDAV
  1. Create a new profile in the Floccus panel
  2. Select XBEL in WebDAV as your sync method
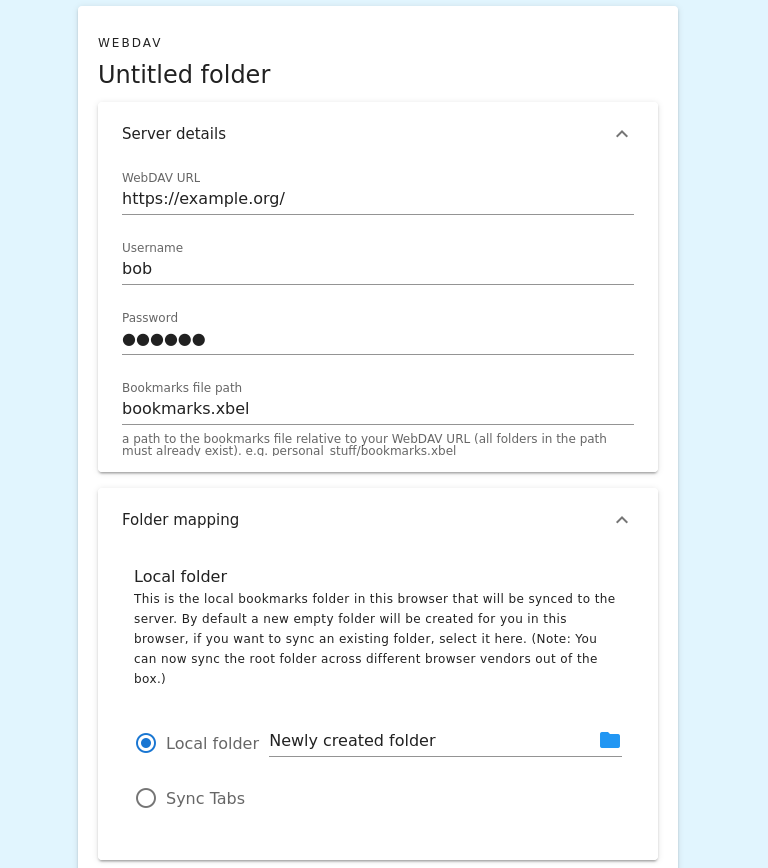
  3. The following screen shows the profile settings.
  4. First you will need to enter your WebDAV URL. This should be the root URL of your WebDAV server, e.g. https://webdav.provider.com. The URL should end with a slash. Here’s a list of the URLs for the most common public providers.
  5. Then enter your username and password.
  6. If you’d like to encrypt your data before storing it in your Drive, you can set a passphrase here. If you don’t enter anything, it won’t be encrypted.
  7. Finally, you can choose which bookmarks folder to sync to that file. By default floccus will create a new folder for you, to avoid syncing something that you don’t want syned. However, with a click on the folder icon you can select any other folder in your bookmarks. Selecting the topmost “untitled” folder will sync everything.
  8. Make sure to disable your native browser bookmark sync service, because it is likely incompatible with floccus
Sync via Google Drive
  1. Create a new profile in the Floccus panel
  2. Select Google Drive as your sync method
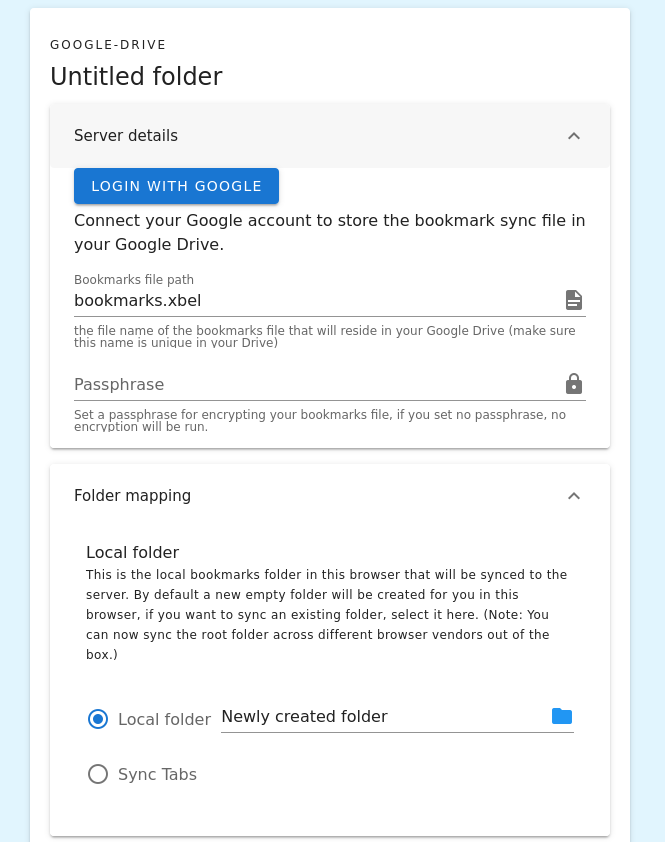
  3. The following screen shows the profile settings.
  4. First you will need to connect floccus with your Google account. After clicking “Login with Google”, you will need to sign in and grant floccus access to your Google Drive.
  5. The next option allows you to specify the path to your bookmarks file in your Drive storage. By default floccus will place a file called bookmarks.xbel in your topmost folder.
  6. If you’d like to encrypt your data before storing it in your Drive, you can set a passphrase here. If you don’t enter anything, it won’t be encrypted.
  7. Finally, you can choose which bookmarks folder to sync to that file. By default floccus will create a new folder for you, to avoid syncing something that you don’t want syned. However, with a click on the folder icon you can select any other folder in your bookmarks. Selecting the topmost “untitled” folder will sync everything.
  8. Make sure to disable your native browser bookmark sync service, because it is likely incompatible with floccus. (This can cause frequent duplication of bookmarks.)
Sync via Git
  1. Create a new profile in the Floccus panel
  2. Select Git over HTTP as your sync method
  3. The following screens show the profile settings.
  4. First you will need to enter your Git repository URL. Make sure to use the HTTPS URL instead of the SSH URL if you have the choice.
  5. Then enter your username and password for your Git hosting provider. Note, that if you have 2-factor authentication enabled for your account, you will need to use some sort of device token here instead of your actual password.
  6. You can then enter a path and filename for the bookmarks file inside your Git repository. The easiest is to just store it in the root.
  7. Finally, you can choose which bookmarks folder to sync to that file. By default floccus will create a new folder for you, to avoid syncing something that you don’t want synced. However, with a click on the folder icon you can select any other folder in your bookmarks. Selecting the topmost “untitled” folder will sync everything.
  8. Make sure to disable your native browser bookmark sync service, because it is likely incompatible with floccus
Choose a sync strategy

Floccus supports unidirectional, one-way sync as well two-directional “merge” sync.

Merge

In merge mode, changes from your local browser are merged with changes from other browsers.

Permanent one-way

Sometimes you want to have one device as a main device and other devices only as listeners. For this scenario you can set the main device to upload & override and all others to download & override to override their changes with the changes from the main device.

Temporary one-way

Occasionally you only want to temporarily override changes from other devices. For this you can use a one-time upload & override.
In order to undo local changes you can do a one-time download & override to revert all your local changes with the latest server state.

Sync tabs

Instead of syncing a local bookmarks folder, Floccus can optionally sync your open browser tabs.

  1. Create a new profile with the sync method of your choice
  2. In the profile settings, select Tabs instead of a local folder to sync

Auto-push

You can enable Auto-sync but set sync strategy to "upload & override". This will automatically push your currently open tabs to the server. Whenever you need the tabs on a different browser, or after a crash, you can click download & override once to get the tabs back.

Manual up- and download

Auto-upload can sometimes cause surprises when you have it enabled on multiple devices or when an empty session is pushed after a browser crash, overriding the previously stored session. This is why you can also turn off auto-sync and up- and download your tabs manually, i.e. when you want to switch to a different device upload your open tabs once on device A and download once on device B – et voila, all your tabs are now on the new device.

Sync tab sessions without merging them

If you would like to sync your tabs from different sessions, but don't want to merge them all together, you may like this idea:

Set up one "push" sync profile on each browser that just pushes tabs to the cloud.
Then on each browser set up one profile for each other browser that "pull" syncs the bookmarks of that browser to a folder in the browser bookmarks.

This way you always have access to the tabs of your other devices without merging them.

How does Floccus deal with your personal data? Privacy Policy

What are your rights when using floccus? License